Author: golfsimadmin

  • How to Choose a Home Golf Simulator: Packages, Prices, and Essential Equipment

    How to Choose a Home Golf Simulator: Packages, Prices, and Essential Equipment

    Choosing a home golf simulator means matching your room, budget, and golfing goals—not simply buying the package with the biggest screen. This home golf simulator buying guide explains the main setup types, essential equipment, price tiers, and ownership costs, so you can compare packages with confidence and avoid paying for features you will rarely use.

    1. Decide What You Want Your Simulator to Do

    Start with your main reason for buying. A golfer working on ball striking needs different equipment from a family looking for casual games. Your priorities should guide the purchase before you compare package names or launch monitor specifications.

    • Practice and improvement: Prioritize reliable ball data, useful practice software, and a comfortable hitting surface.
    • Virtual rounds: Look at course software, realistic shot tracking, and how putting and short shots work.
    • Family entertainment: Favor simple controls, multiplayer options, and forgiving game settings.
    • Occasional use: Consider equipment that stores easily rather than a permanent enclosure.

    Understand the difference between simulator types

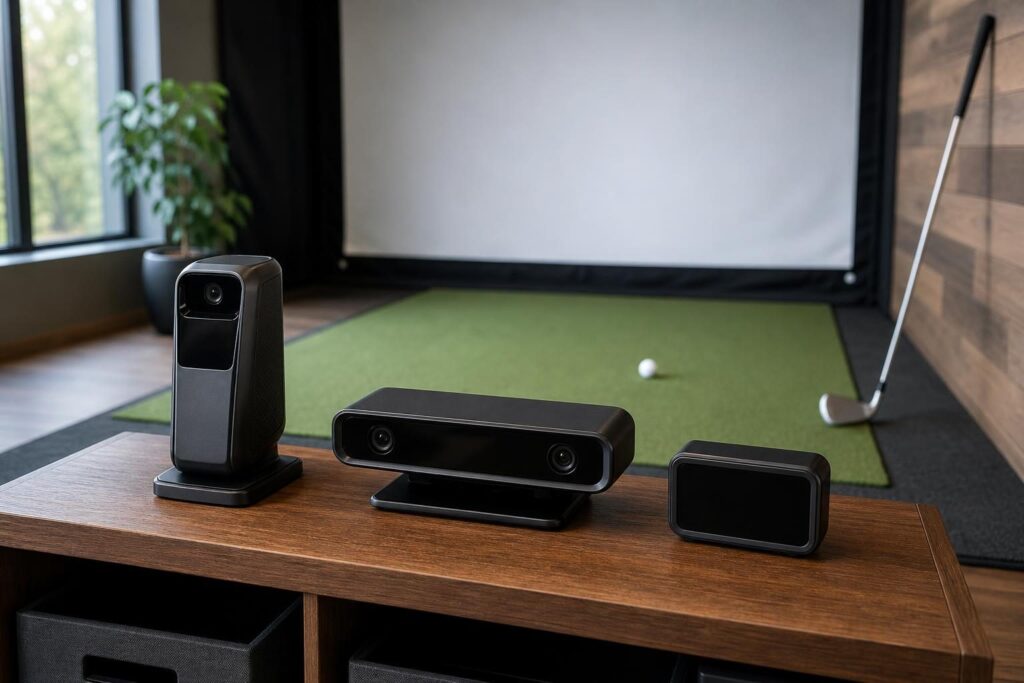
    A launch-monitor-based simulator tracks a real golf ball and uses that information to calculate its virtual flight. Depending on the device, it may also measure or calculate club data. This is generally the category to investigate when realistic practice is the priority.

    Budget systems do not all work this way. OptiShot 2 uses infrared sensors in a hitting platform to track the club passing over them, rather than directly measuring ball flight. Its results therefore need to be understood differently from those of a ball-tracking launch monitor.

    Phigolf 2 uses a motion sensor and can be played with a swing stick. That makes it an option for golf-themed entertainment without a full real-ball hitting area, but it is not a substitute for measured ball-flight feedback.

    Would an outdoor practice net be enough?

    If your goal is simply to make more swings and work on contact, a suitable outdoor net and mat may be all you need. A simulator adds shot feedback, virtual targets, and course play, but also introduces software, power, compatibility, and setup considerations.

    A net alone cannot show the full flight of the ball. You can, however, build a practice area around a net first and add a compatible launch monitor later.

    2. Check Your Space Before Choosing Equipment
    2. Check Your Space Before Choosing Equipment

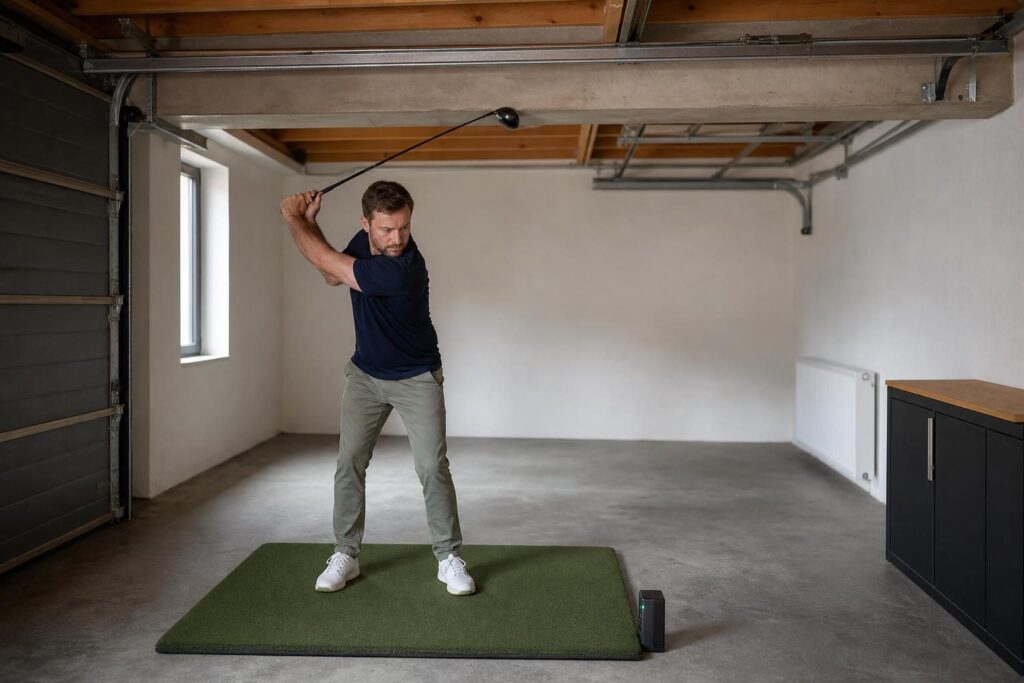
    There is no universal minimum room size that works for every golfer and simulator. Your height, swing, longest club, screen arrangement, and launch monitor all affect the space required.

    Measure the usable area—not just the room dimensions. Garage door tracks, ceiling lights, beams, radiators, and furniture can make an otherwise promising room unsuitable.

    • Height: Allow clearance for a comfortable full swing, including the follow-through.
    • Width: Check club clearance, side protection, and whether both right- and left-handed players will use the setup.
    • Depth: Account for the hitting position, ball-to-screen distance, space behind the screen, and any tracking distance the launch monitor requires.
    • Seating: Keep spectators and other players outside the swing and ball-rebound zones.

    Test the proposed hitting position carefully with your longest club, starting with slow movements and keeping people and breakable objects clear. Do not assume that fitting one cautious swing means you can swing naturally at full speed.

    Match the room to the tracking technology

    Many radar-based launch monitors sit behind the golfer and require a specified amount of ball flight in front. Side-mounted camera systems can suit shorter rooms, although exact requirements vary by model.

    Overhead systems can keep the floor area clear and make switching between right- and left-handed players easier. However, they require suitable mounting positions and may be less practical in a room that must return to normal household use.

    Check the manufacturer’s installation requirements for the exact device. A retailer’s general room recommendation should not replace the launch monitor’s own placement instructions.

    3. Understand the Essential Equipment

    A complete simulator is a collection of parts that must work together. The launch monitor gets most of the attention, but the mat, containment, display, and computer can have just as much influence on everyday enjoyment.

    ComponentWhat it doesWhat to check
    Launch monitor or tracking systemSupplies shot information to the softwareIndoor requirements, measured data, compatibility, and subscriptions
    Hitting matProvides the stance and striking surfaceComfort, stability, replaceable hitting section, and tee options
    Net or impact screenContains golf ballsGolf-ball impact rating, coverage, installation, and clearance
    Enclosure and protectionHelps contain offline and high shotsSide coverage, overhead coverage, and protection around hard surfaces
    SoftwareProvides practice modes and virtual golfDevice support, courses, game modes, and license terms
    Computer or mobile deviceRuns the supported applicationsOperating system and graphics requirements
    DisplayShows shot results and gameplayScreen placement, visibility, and connection options

    Choose the mat and containment carefully

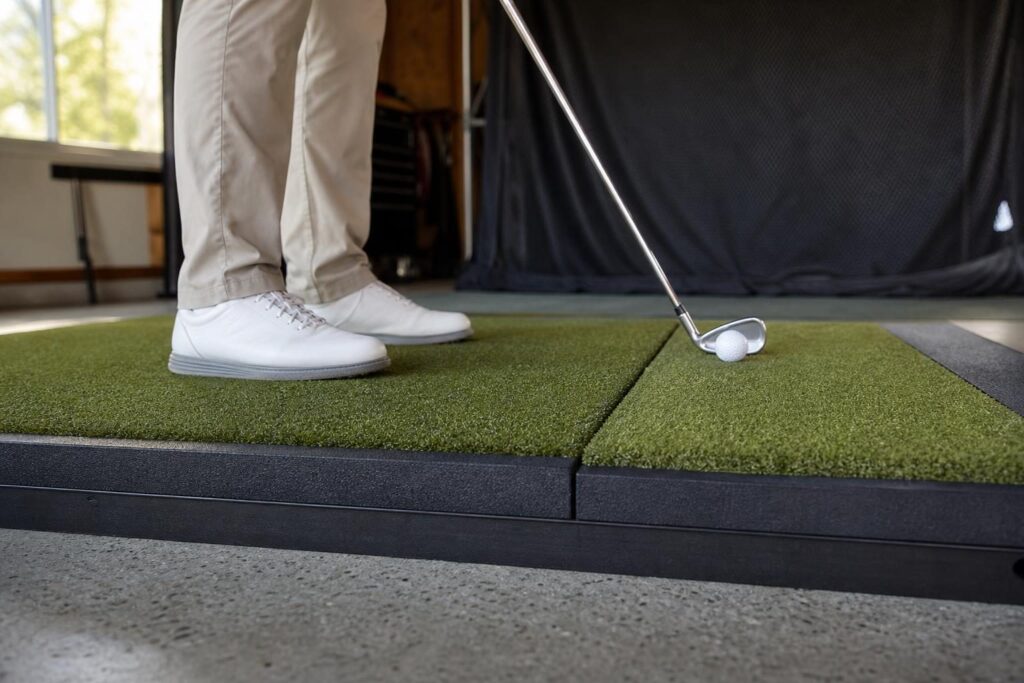
    A mat should remain stable and provide a comfortable hitting surface for repeated practice. A replaceable hitting strip can make it easier to renew the most heavily used section without replacing the entire platform.

    An impact screen is designed to receive golf shots; an ordinary projection screen is not. Follow the screen manufacturer’s guidance on tension, spacing, and installation, because incorrect installation can increase rebound or damage.

    Can you buy a complete package without a projector?

    Yes—a simulator can be fully playable without projection. You can hit into a suitable net while viewing the results on a compatible tablet, monitor, or television positioned safely away from shots.

    A projector makes the experience more immersive, but it is not essential to shot tracking. A projector-free package can also avoid the expense and installation work associated with a projector mount, screen alignment, and cable routing.

    4. Set a Realistic Purchase and Ownership Budget

    Home golf simulator prices span a wide range because a swing-stick game and a dedicated real-ball golf room are very different purchases. Basic entertainment systems can cost hundreds, while substantial launch-monitor packages cost thousands. Premium installations can extend well into five figures.

    Compare the total playable setup, not just the launch monitor price. Package contents and software terms vary, so apparently similar offers may leave you with very different additional costs.

    Packages under $5,000

    When shopping for home golf simulator packages under $5,000, concentrate on the fundamentals: tracking, a usable mat, safe containment, and compatible software. A net-and-display arrangement may let you put more of the budget toward the launch monitor than a projected enclosure would.

    Check whether the advertised total assumes you already own a suitable computer or tablet. Also investigate whether the included software is a practice application, a limited course bundle, or a temporary trial.

    Packages under $10,000

    Home golf simulator packages under $10,000 can offer more scope for an impact-screen enclosure, a better hitting surface, projection, or an upgraded launch monitor. That does not mean every package at this level includes all of those items.

    Decide which improvements matter most. For a practice-focused golfer, better tracking and a comfortable mat may be more valuable than a larger display.

    Hidden costs and running expenses

    Build a separate checklist for expenses beyond the advertised package price:

    • Shipping, taxes, assembly, and installation.
    • A compatible computer, tablet, or graphics upgrade.
    • Projector mounts, cables, adapters, and electrical work.
    • Additional side protection, padding, or flooring.
    • Software subscriptions, course access, and third-party integrations.
    • Replacement hitting strips, screens, balls, and other wear items.
    • Heating, cooling, and electricity for the room.

    To estimate running costs, list each recurring charge and its renewal date, then add a reasonable allowance for wear. Electricity depends on equipment power consumption and usage; conditioning a garage or outbuilding may be a more significant expense than powering the simulator itself.

    5. Choose a Launch Monitor and Software Ecosystem
    5. Choose a Launch Monitor and Software Ecosystem

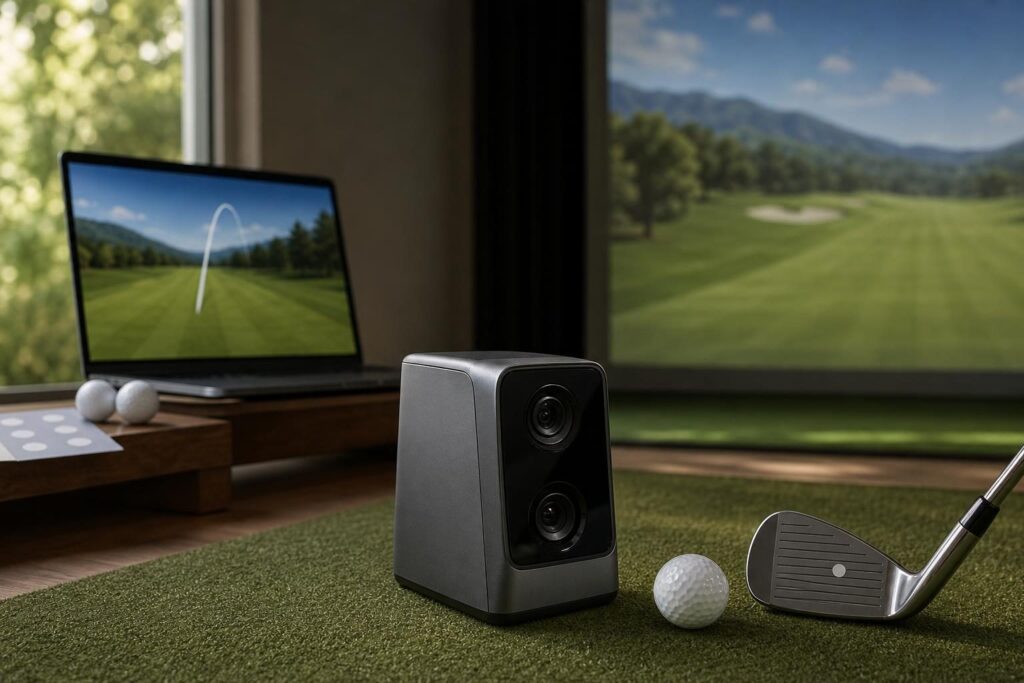
    The launch monitor is the foundation of a real-ball simulator. Choose it for the shots you want to practice, the room you have, and the software you want to run—not simply the longest list of data points.

    Check which figures are directly measured and which are calculated. Also confirm whether advertised club data requires particular balls, club stickers, accessories, or an additional subscription.

    • Shot coverage: Can it handle the chips, pitches, and putts you expect to play?
    • Alignment: How carefully must it be positioned before each session?
    • Hitting area: How much flexibility do you have in ball placement?
    • Software: Which applications and operating systems are supported?
    • Ownership terms: What remains available if you stop paying recurring fees?

    SkyTrak+ versus Uneekor EYE MINI packages

    The SkyTrak+ and Uneekor EYE MINI are examples of side-positioned launch monitors worth comparing for a home setup. Compare their complete package costs, indoor placement requirements, practice tools, and software access rather than evaluating the devices in isolation.

    Also consider handedness changes. A side-positioned unit may need to be moved and realigned when switching between right- and left-handed golfers. Confirm the procedure for the particular model and installation.

    Uneekor packages for dedicated rooms

    Uneekor offers both floor-positioned and overhead launch monitor options. For a dedicated golf room, an overhead configuration may appeal because it leaves the hitting area less cluttered and can accommodate mixed-handed play without moving a floor unit.

    Compare the exact model’s mounting requirements, hitting zone, included software, and computer specifications. Packages within the same brand can differ substantially.

    Foresight Sports SIM IN A BOX Birdie

    The Foresight Sports SIM IN A BOX Birdie package is another option to investigate when comparing bundled systems. Treat the package name as a starting point: verify the current itemized contents, software licenses, computer provision, room requirements, and installation responsibilities before judging its value.

    6. Compare Complete Packages, DIY Builds, and Portable Setups

    A simulator package simplifies shopping by bundling major components. A DIY build lets you choose each part independently. Neither approach is automatically cheaper or better.

    When a package makes sense

    • You want fewer compatibility decisions.
    • You prefer a coordinated enclosure, screen, and display arrangement.
    • You value help from a retailer familiar with the complete configuration.
    • You want a clearer starting point for installation.

    Still ask who supports each component. Buying everything in one transaction does not necessarily mean one company handles every warranty or technical problem.

    When DIY makes sense

    A DIY build can suit an unusual room, an existing collection of equipment, or a buyer who wants precise control over spending. It also makes you responsible for checking dimensions, projector placement, software compatibility, and safe ball containment.

    Compare like for like. A DIY total that excludes a computer, software, or protective materials is not directly comparable with a package that includes them.

    Choosing a portable simulator

    The best portable golf simulator for your home is one you will actually set up. Consider the full routine: unfolding the net, placing the mat, aligning the monitor, connecting the display, and clearing everything afterward.

    Check packed dimensions, component weights, storage conditions, and whether the equipment needs recalibration after moving. A portable launch monitor does not make a heavy mat or large enclosure portable.

    For a shared garage or living space, a net with a tablet display may be more manageable than a projection setup. For outdoor use, verify weather limitations, lighting requirements, and safe containment beyond the intended target.

    7. Plan for Multiplayer Games at Home
    7. Plan for Multiplayer Games at Home

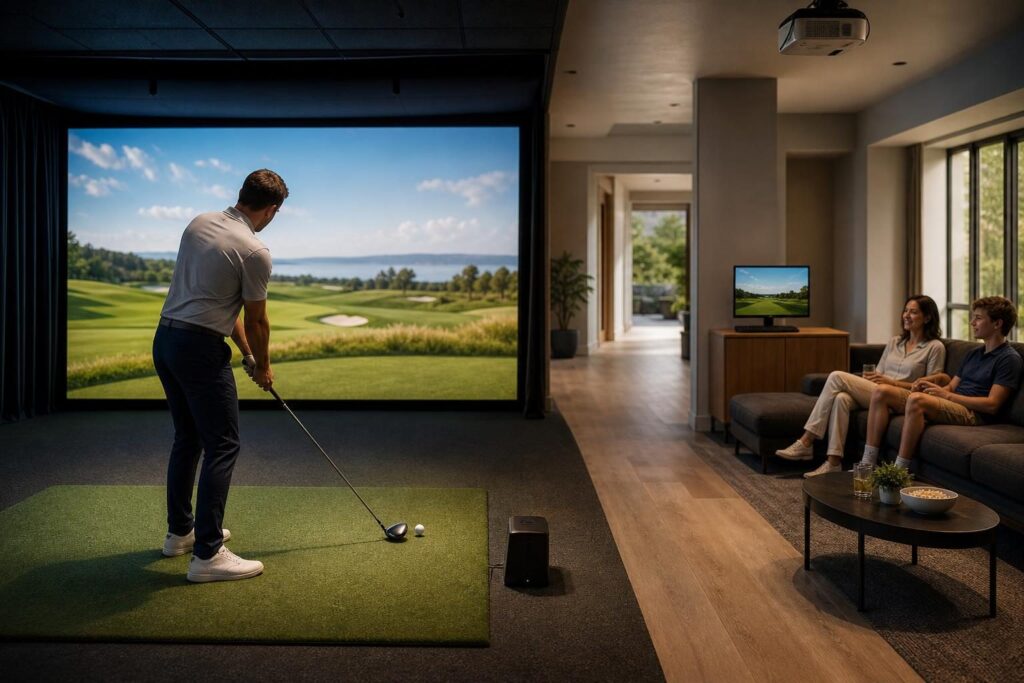
    Multiplayer suitability depends as much on software and room layout as on shot tracking. A system that works well for solo practice may feel awkward during a family evening.

    • Local players: Confirm the number supported by the exact game mode and license.
    • Handedness: Check whether players can switch sides without moving equipment.
    • Putting: Investigate putting support, automatic putting, and gimme settings.
    • Difficulty: Look for adjustable tees, handicaps, and beginner-friendly options.
    • Profiles: Check whether players can save preferences and results.
    • Online play: Verify subscriptions, internet requirements, and supported modes separately from local multiplayer.

    Plan safe waiting and seating areas. Nobody should need to walk through the hitting zone to reach a chair, keyboard, or door.

    A simple control arrangement also helps. Having to leave the mat repeatedly to operate a distant computer can interrupt play, especially with several people sharing a round.

    8. Check That the Package Includes Everything You Need

    Before ordering, ask for an itemized list with exact product names and quantities. Terms such as “complete,” “ready to play,” and “simulator package” do not guarantee identical contents.

    1. Confirm room fit. Check the assembled footprint and all operating clearances.
    2. Identify the tracking hardware. Verify the precise model, condition, and included accessories.
    3. Separate screen from enclosure. Confirm whether framing, side panels, and mounting hardware are supplied.
    4. Check the mat. Review its dimensions, hitting section, and suitability for your planned layout.
    5. Verify the display arrangement. Establish whether a projector, mount, monitor, or television is included.
    6. Check computing requirements. Compare the included or existing device against the software’s recommended specifications.
    7. Read software terms. Distinguish permanent access from trials, subscriptions, and optional upgrades.
    8. Confirm installation responsibilities. Identify any assembly, mounting, electrical work, or calibration you must arrange.
    9. Review support and returns. Check warranties, return shipping, restocking terms, and support contacts.

    Finally, picture an ordinary session from start to finish. Where will you store clubs? How will you turn everything on? Can you reach the controls safely? These practical details often reveal missing items before checkout.

    Conclusion: Buy for Your Room and Priorities

    The right home golf simulator balances safe space, useful feedback, comfortable equipment, and an affordable total cost. Start with your goals and room measurements, choose the tracking system and software next, then compare complete packages against a realistic DIY alternative. A well-matched net-based setup can be a better purchase than an impressive golf room that is awkward to use.

  • How to Choose a Golf Simulator Hitting Mat: Size, Feel, and Durability

    How to Choose a Golf Simulator Hitting Mat: Size, Feel, and Durability

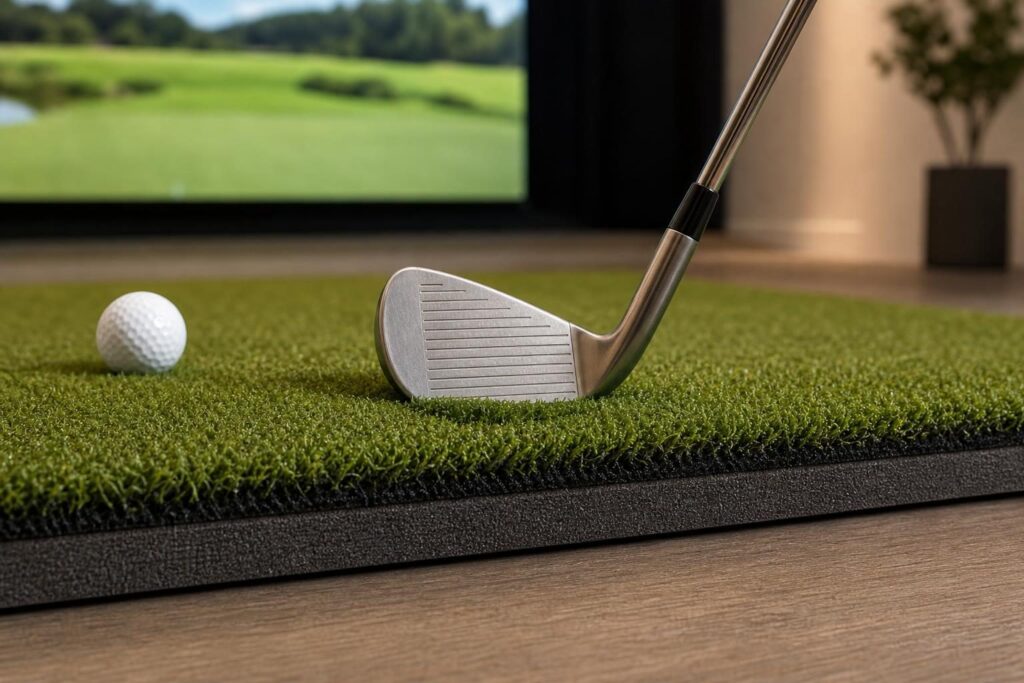
    The best golf simulator hitting mat is not simply the thickest or softest option. It is the mat that fits your space, provides a stable stance, works with your launch monitor, and stays comfortable through regular practice. This guide explains how to compare size, feel, construction, and durability so you can build a setup that suits both your swing and your budget.

    1. Choose the Right Mat Size for Your Space and Swing

    Start with the area you need to stand and swing, not just the dimensions of the turf. A mat can fit neatly inside an enclosure yet still leave you standing too close to its edge or reaching awkwardly for the ball.

    Separate your measurements into three areas:

    • Stance area: Enough room for both feet throughout your setup and finish, including your wider driver stance.
    • Hitting area: Enough turf around the ball to accommodate normal strike variation without hitting an exposed edge or frame.
    • Swing clearance: Space around and above the mat for the club, your body, and a balanced follow-through.

    Use floor markings to map the proposed mat position before ordering. Check your address position with a driver and an iron, then carefully confirm the swing envelope without approaching walls, lights, or ceiling fixtures.

    Plan for your simulator layout

    Mat placement depends on the complete simulator. The launch monitor may require a particular position beside or behind the ball, while the screen or net needs its own safe spacing. Follow the equipment manufacturers’ placement requirements rather than centering the mat purely for appearance.

    If right- and left-handed golfers will share the simulator, plan both hitting positions from the beginning. A larger surface does not automatically solve the problem: the monitor, ball position, and surrounding clearance must also work for both players.

    Check thickness as well as footprint

    A raised mat reduces the headroom available to the golfer. Its finished height also affects the relationship between your feet, the ball, and the launch monitor. Include any platform, underlay, and hitting-strip base when measuring the total height.

    2. Understand Turf Feel, Strike Feedback, and Comfort

    2. Understand Turf Feel, Strike Feedback, and Comfort

    A good hitting surface balances two competing needs: it should provide useful feedback without making routine practice unnecessarily harsh. Softness alone does not tell you whether a mat achieves that balance.

    Feel comes from the complete construction, including turf fibers, backing, cushioning, and the surface underneath. A plush-looking mat over a rigid base may still feel abrupt at impact. Conversely, a surface with controlled movement can feel comfortable without being especially thick.

    Know what happens on a heavy strike

    On real grass, the club can enter the ground after striking the ball. A simulator mat has to manage that downward force differently. Some surfaces compress, some use fibers that let the club pass through, and others incorporate a hitting section designed to move or flex.

    A very forgiving mat can also disguise a heavy strike. The club may bounce or slide into the ball and produce a better result than the same swing would on grass. Look for feedback from strike sound, contact feel, and available launch-monitor data rather than judging every shot by simulated distance.

    Prioritize comfort if your wrists or elbows are sensitive

    Golfers with wrist or elbow discomfort should pay particular attention to impact cushioning, resistance through the hitting zone, and how the mat behaves over its intended base. Compare hitting-surface comfort separately from stance stability: a soft place to hit is useful, but an unstable place to stand is not.

    • Avoid choosing purely on turf thickness or a “joint-friendly” marketing claim.
    • Check return policies, especially if you cannot try the surface before buying.
    • Build practice volume gradually rather than starting with long sessions.
    • Stop if hitting causes pain; a different mat is not a substitute for medical assessment.

    3. Compare One-Piece Mats, Hitting Strips, and Turf Designs

    The main construction decision is whether to buy a complete mat or combine a stance surface with a separate hitting strip. Neither approach is automatically better. The right choice depends on how much you practice and how much installation work you want to do.

    Design Main advantage Main trade-off
    One-piece golf mat Simple setup with a continuous standing and hitting surface Localized hitting wear may require replacing the whole mat
    Mat with a replaceable insert The main wear area can be changed separately Replacement size, fit, and availability matter
    DIY stance platform with hitting strip Flexible layout and a choice of hitting surfaces Requires careful construction and height matching

    Compare construction, not just brand names

    Different mats from the same brand can have different turf systems and impact characteristics. For example, when comparing Fiberbuilt and Country Club Elite mats, look at the exact products’ fiber structure, resistance through impact, cushioning, and maintenance requirements rather than assuming every model shares one feel.

    If the Fiberbuilt Player Preferred Golf Mat is on your shortlist, assess the complete package: hitting feel, stance stability, usable dimensions, and replacement options. Its value depends on how well that configuration fits your room and practice habits, not simply the brand name.

    A dedicated insert such as the SIGPRO Softy hitting strip calls for a slightly different comparison. Focus on the hitting section’s feel, its required opening and support, its finished height, and the availability of a compatible replacement. An insert should be evaluated as part of a complete platform, not as a standalone floor mat.

    4. Check Tee Options and Launch Monitor Compatibility

    If you want to practice with a driver, decide how you prefer to tee the ball. Some mats accept conventional wooden or plastic tees. Others use rubber tees, adjustable holders, or separate tee accessories.

    Real-tee compatibility needs a closer look

    A mat advertised as accepting real tees may still have limits on insertion depth, tee position, or supported tee length. Check how the tee is held and whether it can be adjusted to your preferred ball height.

    • For frequent driver practice: Look for easy height adjustment and a secure tee position.
    • For mixed iron and driver sessions: Make sure the tee arrangement does not interfere with shots played directly from the turf.
    • For shared simulators: Consider how quickly different golfers can change tee height.

    Keep the ball in the monitor’s hitting area

    Your launch monitor may have a limited hitting zone. A large mat is of little benefit if its usable tee positions or replaceable strip sit outside that zone.

    Check the manufacturer’s guidance on ball position, monitor height, alignment, and required markings or accessories. For systems positioned behind the ball, include the required device-to-ball and ball-flight distances in your layout. Recheck alignment after changing mat thickness or moving the hitting position.

    5. Build a Level, Stable Stance and Hitting Platform

    5. Build a Level, Stable Stance and Hitting Platform

    Your feet and the ball should normally sit at the same finished level. Standing above or below the hitting surface introduces an artificial lie and can encourage setup adjustments that do not transfer well to the course.

    This is especially important when pairing a thick hitting strip with a separate stance mat. Compare their finished heights under normal use, not just their unloaded measurements: a soft stance surface may compress more beneath your feet.

    Choose stance turf for stability

    The best stance mats for a DIY golf simulator platform are not necessarily the softest. They should provide dependable footing, resist bunching, and remain consistent as you shift pressure during the swing.

    Because the stance area does not take repeated club strikes, it can use a different construction from the hitting strip. This lets you prioritize a firm, secure footing around a more forgiving impact section.

    Plan a replaceable-strip opening carefully

    A level DIY platform needs a rigid, well-supported base and an opening matched to the selected strip. Follow the strip manufacturer’s support requirements; an insert designed to flex may need a different installation from one intended to sit fully supported.

    • Confirm the strip dimensions before cutting the platform.
    • Allow for turf, backing, and any specified underlay.
    • Keep surrounding edges flush and free of exposed hardware.
    • Make the insert removable without dismantling the entire platform.
    • Check that the assembly cannot rock, shift, or tip.

    Do not assume that adding extra foam will improve the design. Unspecified cushioning can change the strip’s movement, create height differences, or make your footing less stable.

    6. Stop the Mat From Sliding on Concrete

    A mat that moves during a swing is both distracting and a safety concern. Sliding can also alter ball position relative to the launch monitor, making the simulator less consistent.

    Before adding fasteners or adhesive, identify what is moving. The entire mat may be sliding across the floor, the hitting strip may be shifting within its opening, or the upper turf may be separating from its backing. Each problem needs a different fix.

    Start with the floor and backing

    Clean dust and debris from the concrete and the underside of the mat. Check for moisture and confirm that the floor is sufficiently flat. A heavy mat can still move if only part of its backing contacts the floor.

    Depending on the mat and floor, possible solutions include a compatible nonslip underlay, a secure perimeter frame, or an approved fixing method. Check manufacturer guidance before using tape or adhesive, particularly on coated concrete or removable garage installations.

    Avoid solving sliding by placing loose objects around the hitting area. Weights, raised borders, and exposed corners can become trip hazards or enter the club’s path. Whatever method you choose, test stability with controlled movements before making full swings.

    7. Judge Durability and Know When to Replace the Mat

    7. Judge Durability and Know When to Replace the Mat

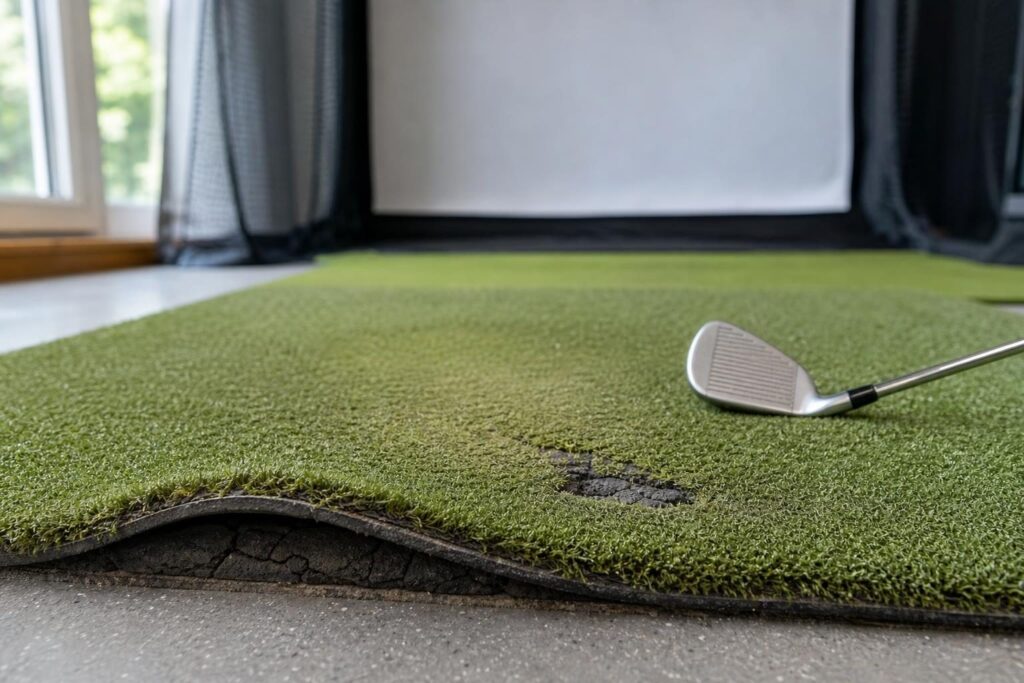
    Durability is about more than whether the turf still looks green. A mat can retain its appearance while the hitting area becomes compacted, the backing deteriorates, or the surface develops an uneven feel.

    Wear depends on practice frequency, strike pattern, club delivery, construction, and installation. Repeatedly hitting from one small spot concentrates wear, while a suitable design may allow you to rotate the mat or use different hitting positions.

    Inspect the hitting zone regularly

    • Matted or thinning fibers: The ball may sit differently or the club may interact with the backing.
    • A persistent depression: The hitting surface may no longer match the surrounding level.
    • A harsher impact feel: Cushioning or structural support may have changed.
    • Loose layers or damaged edges: Separation can affect stability and safe use.
    • Unusual movement: The backing, insert retention, or platform may need attention.

    There is no universal replacement schedule for a golf simulator hitting mat. Inspect its condition and performance rather than replacing it after an arbitrary number of months. A heavily used hitting strip may need attention while the surrounding stance mat remains serviceable.

    Use simple, manufacturer-approved maintenance

    Keep dirt and debris out of the turf, use clean clubfaces, and follow the recommended cleaning method. Rotate the mat only if its design and simulator alignment allow it. Avoid aggressive brushing, soaking, or chemical cleaners unless the manufacturer specifically permits them.

    8. Find the Best Golf Simulator Hitting Mat for Your Budget

    Compare the cost of the complete working setup, not just the advertised mat. A hitting strip may also need a stance surface, platform materials, and a retention system. A one-piece mat may cost more initially but require less installation work.

    Replaceable strips can offer better long-term value when wear is concentrated in the hitting area. However, that advantage depends on replacement availability and cost. Check that replacements are sold separately and confirm their exact dimensions before committing to a platform.

    Use this buying checklist

    1. Confirm the layout: Check stance space, swing clearance, screen placement, and launch monitor requirements.
    2. Choose the impact feel: Prioritize manageable resistance and useful strike feedback.
    3. Decide on construction: Select a one-piece mat, modular mat, or separate stance-and-strip setup.
    4. Verify tee compatibility: Make sure your preferred tee method works at the required ball position.
    5. Match finished heights: Account for the base, platform, turf, and compression underfoot.
    6. Plan stability: Determine how the mat and any insert will stay securely in place.
    7. Check ownership costs: Review replacement parts, maintenance instructions, warranty terms, and returns.

    For occasional practice, a straightforward, stable mat may be the most practical purchase. For frequent sessions, impact comfort and an easily replaceable hitting zone deserve more weight. Shared simulators need particular attention to layout, adjustment, and wear.

    Conclusion

    The best golf simulator hitting mat combines adequate space, comfortable impact behavior, secure footing, and a sensible replacement plan. Start with your room and launch monitor requirements, then compare construction and feel. A mat that stays level, remains stable, and suits your practice volume will serve you better than one chosen on thickness or appearance alone.

  • Golf Simulator Projector and Screen Guide: Throw Distance, Brightness, and Sizing

    Golf Simulator Projector and Screen Guide: Throw Distance, Brightness, and Sizing

    A golf simulator’s picture quality depends on more than the projector. Screen dimensions, throw distance, room lighting, mounting position, and impact-screen construction all work together. This golf simulator projector and screen guide explains how to match those pieces, avoid common installation mistakes, and build a setup that looks good without compromising swing space or safety.

    1. Start With the Room, Not the Projector

    Before comparing projectors, measure your usable room width, depth, and ceiling height. Include garage-door tracks, beams, lights, storage, and anything else that could interfere with a club, projector mount, or enclosure.

    Next, establish where you can swing comfortably. Use your longest club and make slow practice swings without a ball, checking clearance throughout the swing. Consider every golfer who will use the simulator, including both right- and left-handed players if relevant.

    Your layout needs room for several separate elements:

    • Screen and enclosure: Including the frame, side protection, and clearance behind the impact surface.
    • Hitting position: Far enough from the screen for the equipment manufacturer’s recommendations and your chosen layout.
    • Launch monitor: With the required placement, ball-flight distance, and unobstructed sensing area.
    • Projector: Positioned to fill the screen without entering the swing path or creating distracting shadows.
    • Seating and circulation: Safely outside the hitting and ball-rebound areas.

    Do not choose the screen size in isolation. A screen that technically fits between two walls may still leave insufficient room for its frame, side netting, or a safe hitting position.

    Mark the proposed screen, hitting area, and projector position before buying. This simple layout exercise often reveals conflicts that product specifications alone cannot show.

    2. Choose Screen Size and Aspect Ratio Together

    2. Choose Screen Size and Aspect Ratio Together

    For a golf simulator, screen width and height are usually more useful than diagonal size. Width influences immersion, while height determines how much of the available wall becomes usable image area.

    Distinguish the screen’s overall dimensions from its viewable area. Borders, attachment tabs, and enclosure components can reduce the area available for projection. Calculate your image around the manufacturer’s stated viewable dimensions.

    Common simulator aspect ratios

    Aspect ratio describes the relationship between image width and height. The best choice depends on your room and how your projector, computer, and simulator software handle the desired output format.

    Aspect ratioWhere it can work wellMain consideration
    16:9Wider rooms and setups also used for movies or gamingMatches many home-entertainment projectors but may leave unused height
    16:10Rooms needing a somewhat taller image relative to widthCheck projector resolution and software compatibility
    4:3Narrower rooms where a tall screen makes better use of the wallWidescreen projectors may require unused image area or compatible custom output settings

    To calculate image height, divide the width by the aspect ratio. A 12-foot-wide 16:9 image is 6.75 feet tall. A 12-foot-wide 4:3 image is 9 feet tall.

    A projector can often display content in a different aspect ratio, but that does not mean it uses its full imaging area efficiently. Black bars, scaling, or cropping may result. Confirm the exact signal formats and aspect controls before assuming a widescreen model will perfectly fill a taller screen.

    For an irregularly shaped space, a custom-size impact screen may be practical. However, custom screen dimensions do not automatically guarantee a matching projected image.

    3. Calculate Throw Distance and Check Mounting Geometry

    Throw distance is the distance from the projector’s lens to the screen. Throw ratio connects that distance to image width:

    Throw distance = image width × throw ratio.

    For example, a projector with a 0.8:1 throw ratio needs approximately 8 feet of lens-to-screen distance to create a 10-foot-wide image. At 1.2:1, that same image requires approximately 12 feet.

    Keep your units consistent, and measure from the lens rather than the back of the projector. A zoom lens may provide a throw-ratio range, allowing some flexibility in mounting distance.

    Short-throw versus standard-throw projectors

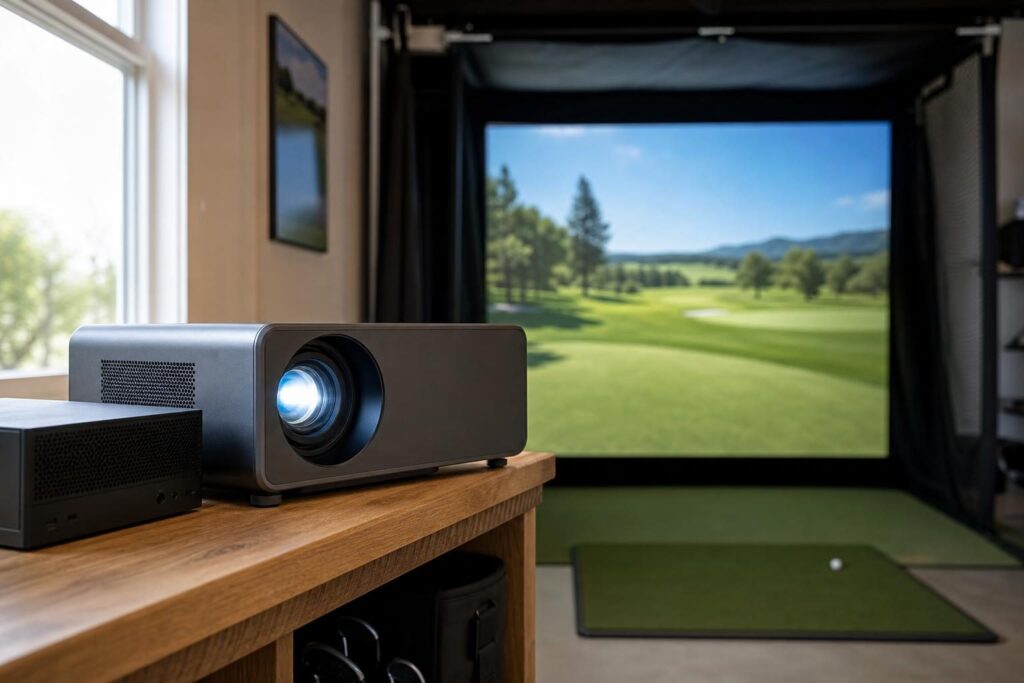
    Short-throw projectors create a larger image from closer to the screen. This can help position the projector ahead of the golfer and reduce shadows, although the actual result depends on mounting height and hitting position.

    Standard-throw projectors need more distance for the same image width. They can work well in deeper rooms, but a position behind the golfer may introduce shadows or conflict with other equipment.

    Ultra-short-throw models are a separate category. Their very close placement and sensitivity to screen flatness can make flexible impact screens challenging. Do not assume a projector designed for a rigid home-theater screen will suit a golf enclosure.

    Throw distance is only part of the calculation

    Also check:

    • Vertical offset: Where the image appears above or below the lens in the intended mounting orientation.
    • Lens shift: Whether the image can move optically without repositioning the projector.
    • Mount dimensions: The space taken up by the bracket, projector body, and cable connections.
    • Swing clearance: Whether the projector or mount could be struck by a club.
    • Ball protection: Whether an exposed projector needs a suitable protective enclosure with adequate ventilation.

    Models such as the BenQ TK700STi are relevant to golf-simulator comparisons because they combine short-throw projection with 4K UHD image capability. Still, assess the exact throw range, image offset, mounting requirements, and image quality rather than treating the short-throw label as a guarantee of fit.

    Use the manufacturer’s projection calculator and installation manual to verify your calculations. Minimize digital keystone correction where possible: it can reshape an image, but it does not correct a fundamentally unsuitable mounting position and can reduce usable image detail.

    4. Match Brightness to Ambient Light and Image Size

    A projector that looks bright on a small screen in darkness may look washed out on a large simulator screen with the garage door open. Brightness requirements increase with image area and ambient light.

    Look for brightness measurements using recognized methods, such as ANSI or ISO specifications. Be cautious with vague marketing terms that do not identify a measurement method. Even standardized maximum-brightness figures do not tell you exactly how bright a projector will be in its most color-accurate mode.

    Control light before paying for more brightness

    • Block direct sunlight from windows and garage-door glazing.
    • Keep ceiling lights from shining onto the screen.
    • Use task lighting aimed at the hitting area rather than the projection surface.
    • Add dark, nonreflective material around the screen to reduce reflected light.

    A brighter projector can improve usability in a partially lit room, but it cannot restore deep blacks on a screen illuminated by daylight. Ambient light raises the screen’s black level, reducing perceived contrast.

    When comparing projectors for rooms with ambient light, prioritize useful brightness, readable course detail, and acceptable color in the mode you will actually use. For a dedicated dark simulator room, contrast and color balance may deserve more weight.

    Also consider image size. Spreading the same light over a larger surface makes the picture dimmer. If your budget is limited, a slightly smaller image with better light control may look better than the largest image the wall can hold.

    5. Decide Between 1080p and 4K—and Set a Realistic Budget

    5. Decide Between 1080p and 4K—and Set a Realistic Budget

    Both 1080p and 4K can deliver an enjoyable golf simulator experience. The value of higher resolution depends on screen size, viewing distance, software graphics, and the computer driving the image.

    1080p is often the practical budget choice. It can provide a clear, playable image while leaving more money for a safe enclosure, a better impact screen, or effective light control.

    4K provides greater displayed detail, which can improve course textures, distant features, and small interface text. The difference is generally more noticeable on larger screens and at closer viewing distances.

    However, an impact screen is a textured surface that moves when struck. It will not necessarily reveal fine detail as cleanly as a rigid cinema screen. Poor focus, wrinkles, ambient light, or aggressive digital correction can also reduce the visible benefit of additional resolution.

    Check the whole signal chain

    Before paying extra for 4K, confirm that your computer can run the simulator at your target resolution and frame rate. Check the projector’s supported inputs, cable requirements, and any limitations associated with particular display modes.

    Projectors marketed as 4K may use different imaging technologies, including pixel shifting. Compare actual image performance rather than relying only on a resolution badge.

    For a budget projector, prioritize these essentials:

    1. The correct throw range and mounting geometry.
    2. Enough usable brightness for your room.
    3. Consistent focus across the screen.
    4. Suitable input support and responsiveness.
    5. Reasonable maintenance costs and warranty support.

    Lamp-based and solid-state light sources have different maintenance considerations. Replacement lamps, filter cleaning, fan noise, and ventilation all deserve attention. A low purchase price is less attractive if the projector cannot fit the room or requires expensive corrective work.

    6. Choose an Impact Screen for Both Picture and Ball Performance

    A golf impact screen must withstand repeated ball strikes while providing a usable projection surface. Ordinary projector fabric, bedsheets, and improvised tarps are not substitutes for a purpose-built golf impact screen.

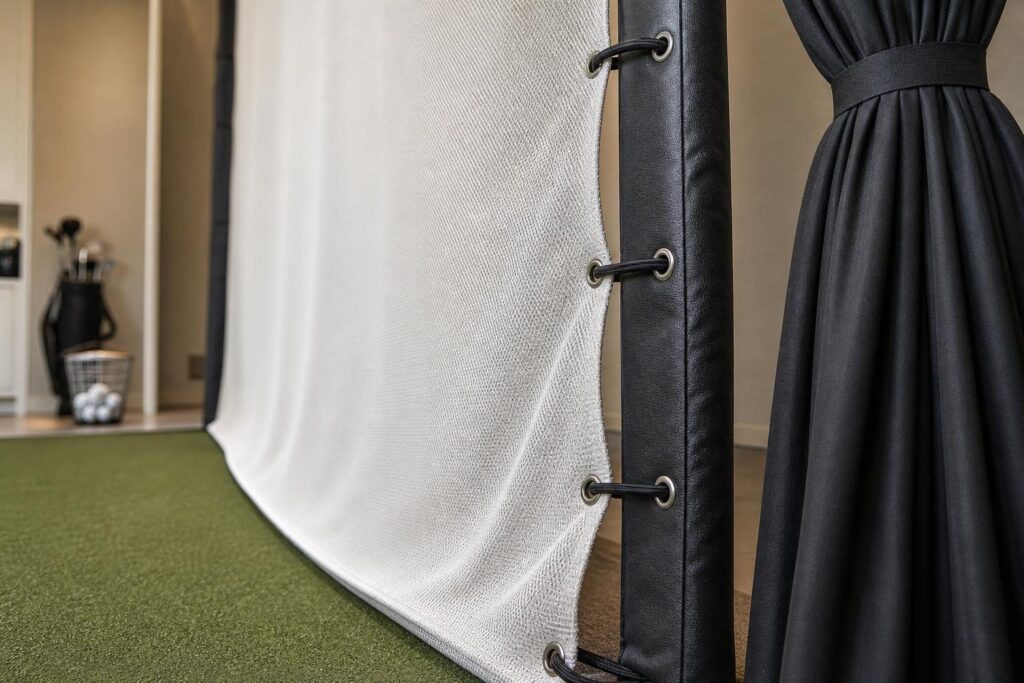
    Screen construction affects image texture, sound, durability, and rebound behavior. Smoother surfaces can show finer image detail, while layered designs may help manage impact noise. Neither feature eliminates the need for correct installation.

    When comparing screens, assess:

    • Surface finish: Texture, weave visibility, and how evenly the material displays the image.
    • Impact suitability: The manufacturer’s intended golf use and installation requirements.
    • Noise: Both the impact sound and vibration transmitted into the frame or building.
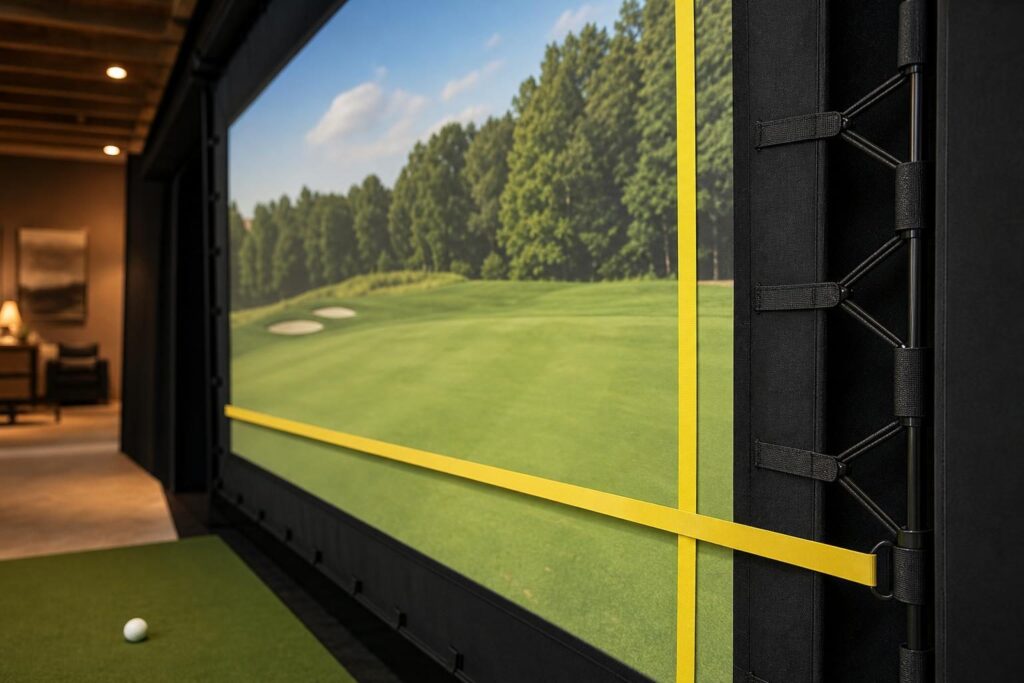
    • Attachment method: How the screen connects to the enclosure and allows tension adjustment.
    • Care requirements: Approved cleaning methods and guidance on ball condition.
    • Replacement options: Whether the impact surface can be replaced without rebuilding the enclosure.

    The Carl’s Place Premium Impact Screen is one established option to consider when comparing picture quality and ball-impact behavior. As with any screen, separate material characteristics from installation effects: tension, rear clearance, and frame padding can substantially change the experience.

    Use clean, undamaged golf balls and keep clubfaces clean. Dirt, scuffs, and transferred markings can degrade the screen’s appearance. Follow the screen maker’s cleaning instructions rather than experimenting with strong detergents or abrasive tools.

    7. Install for Safe Impact, Low Bounceback, and Flexible Use

    7. Install for Safe Impact, Low Bounceback, and Flexible Use

    Bounceback is a safety issue, not simply an annoyance. A screen pulled excessively tight can behave like a trampoline, while hard objects immediately behind it can cause abrupt rebounds or damage.

    Follow the manufacturer’s instructions for rear clearance, attachment spacing, and tension. There is no single clearance or tension setting that suits every screen and enclosure.

    Reduce rebound without creating new hazards

    • Provide the specified space behind the screen so it can deflect.
    • Use the recommended attachment system rather than rigidly stretching the material.
    • Pad exposed frame members and protect surrounding hard surfaces.
    • Include suitable side and overhead protection for mishits.
    • Keep spectators and loose equipment outside the hitting and rebound zones.

    If bounceback is excessive, stop hitting and inspect the installation. Check for overtensioning, inadequate rear clearance, or contact with a wall or frame. Do not add heavy backing layers without checking compatibility; extra material can change how the screen moves and absorbs impact.

    Retractable screens for multipurpose garages

    A retractable impact screen can free up space when the simulator is not in use. Choose a system explicitly designed for golf-ball impact, not a conventional retractable movie screen.

    Check how the deployed screen is restrained, whether side protection retracts or needs separate storage, and how the bottom edge is secured. Any bottom bar must be protected from ball strikes according to the system’s design.

    Garage-door movement introduces another constraint. Confirm that the screen, projector, enclosure, and cables remain clear throughout the door’s travel. A retractable screen does not make a shared garage practical unless the rest of the setup also stores safely.

    8. Verify Compatibility Before You Buy

    The best golf simulator projector and screen combination is one that works as a complete system. Before ordering, create a simple specification sheet with your measurements and intended settings.

    Item to confirmWhat to record
    ScreenViewable width, height, aspect ratio, and required rear clearance
    ProjectorThrow range, lens position, offset, mount orientation, and ventilation needs
    Hitting areaBall position, swing clearance, and protection for mishits
    Launch monitorRequired placement and operating space
    Computer and softwareOutput resolution, aspect-ratio support, and graphics capability
    CablingSignal format, route length, power access, and protection from foot traffic

    If possible, temporarily position the projector and display a test grid before finalizing the mount. Check edge alignment, corner focus, screen coverage, and shadows from the actual hitting position.

    Finally, plan routine maintenance. Inspect screen attachments, padding, mounting hardware, and cables regularly. Keep projector vents clear, and follow the manufacturer’s cleaning procedures. Small changes in screen tension or projector alignment can affect both safety and picture quality.

    Conclusion

    Start with safe room geometry, choose a screen size and aspect ratio that fit, and then select a projector with the correct throw range and sufficient brightness. Resolution matters, but it comes after placement, light control, and screen quality. Treating these decisions as one connected system is the most reliable route to a clear, immersive, and practical home golf simulator.

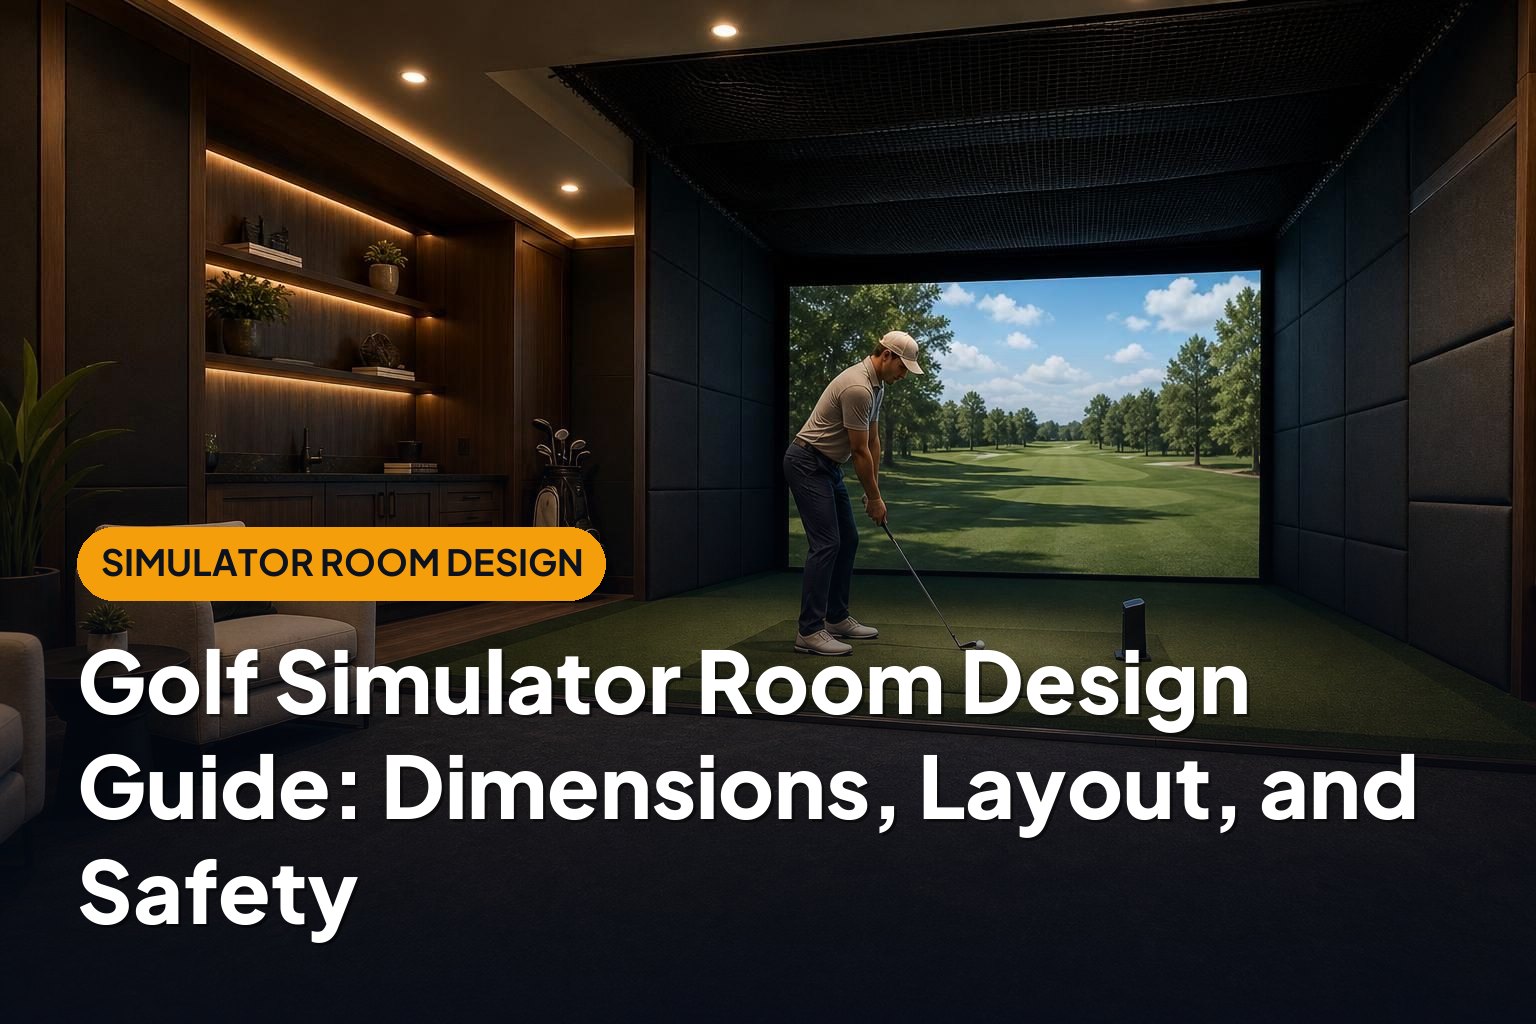
  • Golf Simulator Room Design Guide: Dimensions, Layout, and Safety

    Golf Simulator Room Design Guide: Dimensions, Layout, and Safety

    A good home golf simulator starts with the room, not the launch monitor. The right dimensions, hitting position, lighting, and protective barriers help create a space that is comfortable to use and safer for golfers, spectators, and the rest of your home. This golf simulator room design guide explains how to plan the whole setup, from your first measurements to the checks you should make before hitting a ball.

    1. Measure the Room and Define Your Space Requirements

    Before comparing equipment, measure the usable room—not just its wall-to-wall dimensions. A ceiling beam, garage door opener, support column, or low light fixture can make an otherwise promising space unsuitable.

    Record these measurements in a simple floor plan:

    • Width: Measure at the proposed hitting position and across the full swing area.
    • Depth: Include space behind the screen, the ball-to-screen distance, and clearance behind the golfer or launch monitor.
    • Height: Measure from the top of the finished hitting mat to the lowest obstruction within the swing area.
    • Access: Mark doors, stairs, storage cabinets, electrical panels, windows, and walkways.
    • Fixed equipment: Note pipes, ducts, overhead storage, garage tracks, and ceiling-mounted appliances.

    Use Planning Ranges, Not Guaranteed Minimums

    The following dimensions are useful starting points for comparing rooms. They are not universal requirements: golfer height, swing shape, club length, and equipment choice can change what works.

    DimensionEarly planning rangeWhat determines the final requirement
    Ceiling heightAbout 9–10 feet or moreThe tallest golfer, longest intended club, mat thickness, and overhead obstructions
    Room widthAbout 10–12 feet for some single-handed layouts; 14–16 feet offers more flexibilitySwing clearance, hitting position, enclosure width, and left- or right-handed use
    Room depthAbout 16–20 feet for many projected setupsScreen clearance, ball position, launch monitor requirements, and rear access

    A compact setup may fit outside these ranges, while another system may need more room. Confirm the exact requirements of the selected launch monitor, enclosure, screen, and projector before buying.

    Use painter’s tape to mark the screen face, enclosure frame, mat, and ball position on the floor. This simple exercise often reveals problems that a room measurement alone will miss.

    2. Check Ceiling Height and Full-Swing Clearance

    2. Check Ceiling Height and Full-Swing Clearance

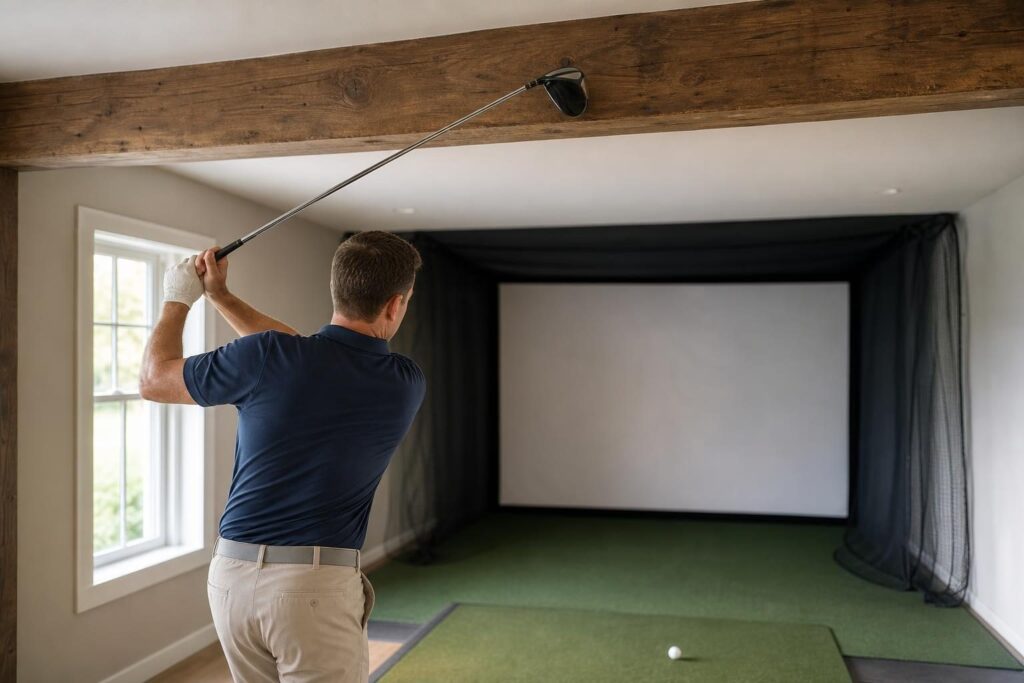
    Ceiling height is one of the hardest constraints to fix later. A room can have enough floor space yet still force you to shorten your backswing or change your finish.

    Start by checking the area around the entire swing, not just directly above the ball. The club travels behind and beside you, and a beam several feet from the hitting spot may still be in its path.

    Can You Use a Golf Simulator With an 8-Foot Ceiling?

    Sometimes, but an 8-foot ceiling is a significant limitation. Some golfers may have room for shorter clubs, while many will not have enough clearance for a normal driver swing. Golfer height alone does not settle the question because swing planes differ.

    Do not treat an 8-foot ceiling as suitable for unrestricted golf simply because a mat and screen fit beneath it. If only partial swings or short irons are practical, design the room around that limitation rather than encouraging a cramped swing.

    Choose Low-Ceiling Equipment Carefully

    A low-profile enclosure can reduce the space occupied by its frame, but it cannot create additional club clearance. When evaluating enclosures for low ceilings, check the actual assembled height, connectors, padding, and installation space—not just the advertised screen size.

    Avoid overhead lights or projector mounts within the possible club path. Where practical, position equipment outside the swing area, while still meeting its mounting and operating requirements.

    Never use a full-speed swing to discover whether a room is tall enough. Begin with an empty, cleared space and slow, controlled movement. If clearance remains uncertain, choose another location or restrict the intended use.

    3. Plan the Hitting Position, Traffic Flow, and Room Location

    The hitting position connects every part of golf simulator room design. It determines swing clearance, screen alignment, launch monitor placement, projector geometry, and where other people can safely stand.

    Centered Versus Offset Hitting

    A centered hitting position is convenient when both left- and right-handed golfers will use the simulator. However, accommodating both swing directions usually requires more width.

    An offset position can make a narrower room workable for one handedness. The trade-off is that the image may appear off-center, and the opposite-handed golfer may not have adequate clearance. Some simulation software supports an offset aiming position, but this does not solve physical space limitations.

    Garage Versus Basement

    A garage often provides useful floor area, but door tracks, opener motors, sloped floors, temperature swings, and vehicle access complicate the layout. Check the space with the garage door in every position you expect to use.

    A basement may offer a more permanent, comfortable installation, but low ceilings, beams, support columns, moisture, and difficult equipment access are common constraints. Consider how impact noise could travel into the rooms above.

    For either location, plan for:

    • A clear entry route that does not cross an active hitting area.
    • Seating outside both the swing envelope and potential ball flight paths.
    • Accessible doors, utilities, and required emergency exits.
    • Enough room to maintain equipment without dismantling the whole installation.
    • Storage for clubs and accessories that cannot fall into the hitting area.

    A shared room also needs a realistic changeover plan. Movable mats and retractable screens can help, but their positions should be repeatable so alignment and clearances remain consistent.

    4. Choose Between an Enclosure and a Hitting Net

    Your main containment options are a projected impact screen, usually within an enclosure, or a hitting net paired with a separate display. Neither option is automatically safer; the result depends on coverage, installation, condition, and how well the setup suits the golfers using it.

    Impact Screen and Enclosure

    An enclosure creates a defined hitting bay and supports an immersive projected image. Its side and roof panels can help contain mishits, although their coverage varies by design.

    Allow the specified space behind the impact screen so it can deflect without striking a wall or other hard surface. Screen tension matters too: an incorrectly installed screen can produce excessive rebound or wear.

    A DIY enclosure such as those offered by Carl’s Place introduces several fit checks beyond screen dimensions. Review the assembled frame footprint, required pipe specifications if sourcing your own frame components, connector space, and clearance needed for assembly. A frame that technically fits may still be difficult to build or service in a tight room.

    Screen-Free Hitting Net

    A purpose-built golf net can simplify a setup by removing the projector and impact screen from the plan. Products such as The Net Return Pro Series suit this general approach, with shot information shown on a separate monitor or television.

    A net still requires adequate swing room, clearance from walls, and protection against shots that miss its capture area. Do not assume every net permits the same ball speed, club use, or distance from the golfer.

    Side and Overhead Protection

    Side protection nets are especially useful where a shank could reach a wall, window, doorway, or person. Overhead protection may also be appropriate for high-launching mishits.

    Choose golf-rated containment and follow its installation instructions. Check gaps at floor level, between panels, and around the enclosure entrance. Exposed frame sections may need suitable padding, but padding is not a substitute for preventing direct ball contact with hard components.

    5. Match the Launch Monitor, Screen, and Projector to the Layout

    5. Match the Launch Monitor, Screen, and Projector to the Layout

    Choose the equipment as a system. A launch monitor that works well in one room may be a poor fit for another because of where it must sit and how much ball flight it needs to observe.

    Launch Monitor Placement

    Many radar-based systems sit behind the golfer and require specified distances both behind the ball and between the ball and screen. Some camera-based systems sit beside the hitting area, while others mount overhead.

    These categories are only a starting point. Check the exact model’s indoor space requirements, hitting zone, alignment procedure, lighting needs, and any special ball requirements.

    For mixed-handed use, consider whether a floor-mounted device must be moved between players. An overhead system may make switching easier, but it can introduce mounting-height and installation constraints.

    Projection and Image Size

    Match the screen’s usable image area to the projector’s aspect ratio and throw requirements. The enclosure’s outside dimensions are not necessarily the same as the visible projection area.

    Before selecting a projector, confirm:

    • The lens-to-screen distance required for the desired image width.
    • Whether the mounting position creates shadows.
    • Whether the projector or its protective housing enters the swing area.
    • Whether the screen shape matches the intended image format.
    • How power and video cables will reach the unit safely.

    Prefer correct physical placement over relying heavily on digital image correction. For a net-based simulator, place the separate display where it is easy to read but protected from errant shots.

    6. Design Lighting, Power, and Cable Management

    Good simulator lighting keeps the ball, controls, and walking areas visible without washing out the projected image. Lighting the whole room brightly is rarely the best solution.

    Use Separate Lighting Zones

    A practical plan separates the hitting area, screen area, and seating or access areas. Dimmable fixtures make it easier to balance projection quality with comfortable visibility.

    Direct light toward the mat rather than the screen, and keep fittings outside the club path. Shielded or recessed fixtures can help in some rooms, but even a recessed fitting must be considered when checking ceiling clearance.

    Some launch monitors have specific lighting or infrared requirements. Confirm compatibility before committing to fixtures, dimmers, or decorative lighting.

    Plan Electrical Connections Early

    List everything that needs power: launch monitor, computer, projector, display, lighting, network equipment, and climate-control devices. Arrange outlets so cords do not cross walkways or the hitting area.

    Use appropriate cable protection and strain relief where needed. Avoid improvised permanent extension-cord arrangements, and use a qualified electrician for new outlets, circuits, or work requiring professional installation.

    A reliable network connection is also worth planning. Check software requirements and signal quality before placing the computer in a distant cabinet or equipment closet.

    7. Control Noise and Keep the Room Comfortable

    7. Control Noise and Keep the Room Comfortable

    Simulator noise comes from more than the ball hitting the screen. Club impact, foot movement, frame vibration, fans, and sound reflecting from hard surfaces can all affect nearby rooms.

    Reduce Echo and Sound Transmission Separately

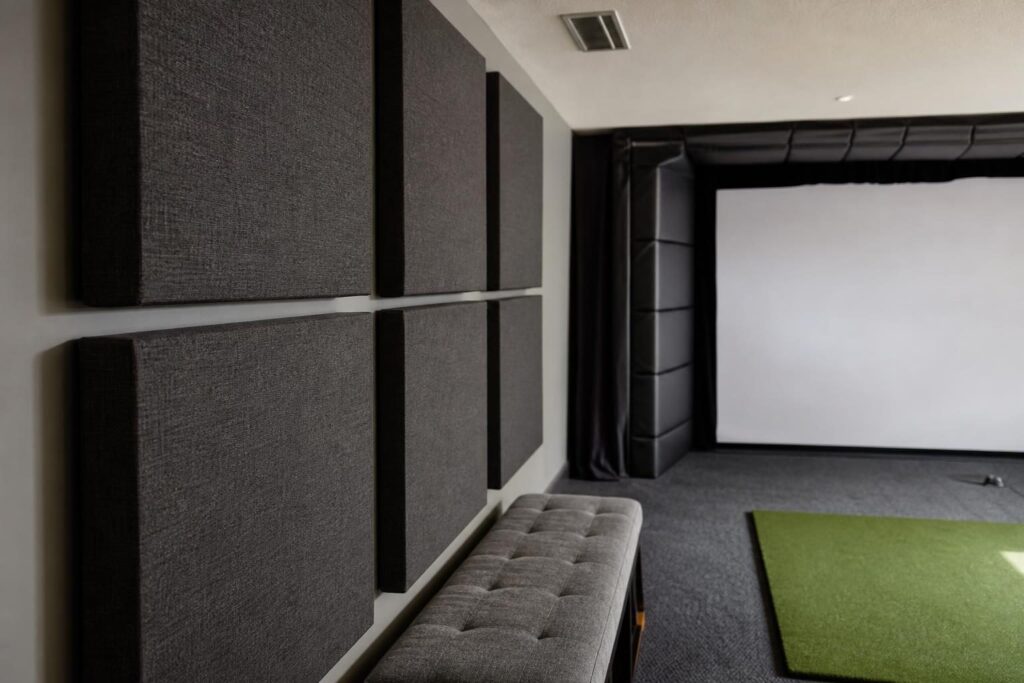
    Soft finishes and acoustic panels can reduce echo inside the simulator room. They do not, by themselves, soundproof it.

    Reducing noise transmission into a shared home may require attention to doors, wall and ceiling construction, air gaps, and structural vibration. More substantial isolation work is best considered before finishing the room.

    For a quieter setup:

    • Use a suitable hitting mat and supporting surface.
    • Install the screen at the manufacturer’s recommended tension.
    • Address loose frame connections or vibrating components.
    • Consider whether rigid attachments could transfer vibration into the building.
    • Agree on playing hours if bedrooms or shared living spaces are nearby.

    Manage Temperature, Moisture, and Flooring

    Garages may need heating, cooling, or insulation to remain comfortable. Basements may need moisture control before adding turf, mats, electronics, or wall treatments.

    Choose a stable, slip-resistant floor and keep the hitting surface level. If the stance mat and hitting strip have different heights, correct the mismatch rather than adapting your posture to it.

    Maintain airflow around computers and projectors. Do not block vents with acoustic materials, enclosure fabric, or storage.

    8. Complete a Safety and Installation Check

    Containment should account for poor shots, not just straight ones. Beginners, children, and experienced golfers can all hit unexpected launch angles or miss the intended striking area.

    Before the first session, work through this checklist:

    1. Verify swing clearance: Recheck from the finished mat surface with every intended golfer and club type.
    2. Inspect containment: Look for uncovered hard surfaces, open seams, worn netting, and exposed frame sections.
    3. Confirm screen clearance: Keep the required deflection space clear of stored items and walls.
    4. Secure equipment: Follow mounting and anchoring instructions, using fasteners appropriate to the building structure.
    5. Protect people: Establish a waiting area outside the swing and possible rebound zones. Keep children and pets out of the active bay.
    6. Clear the floor: Remove loose balls, bags, cables, and other trip hazards.
    7. Inspect balls and clubs: Damaged or dirty balls and damaged clubheads can harm screens or create additional risks.
    8. Introduce play gradually: Begin with controlled, lower-energy shots and check containment and rebound behavior before progressing.

    Do not place spectators in areas that depend on the golfer hitting straight. If a shot escapes containment or rebounds dangerously, stop using the setup until the cause is corrected.

    Repeat these checks after moving the mat, changing screen tension, replacing equipment, or converting a shared room back into simulator mode. Inspect nets, screens, attachments, and padding regularly for wear.

    9. Conclusion: Design Around the Room You Actually Have

    The best golf simulator room design balances usable dimensions, natural swing clearance, reliable ball containment, and everyday comfort. Measure first, confirm equipment requirements together, and leave room for safe movement and maintenance.

    A carefully planned net setup can be a better choice than a cramped projection enclosure. Build around your room’s real limits, and prioritize a comfortable swing and dependable protection over the largest possible screen.

  • How to Choose a Launch Monitor for an Indoor Golf Simulator

    How to Choose a Launch Monitor for an Indoor Golf Simulator

    The best launch monitor for indoor golf simulator use is the one that fits your room, captures the shots you care about, and works with your preferred software. A device with an impressive feature list can still be the wrong choice if it needs more ball flight than your space allows or makes switching between golfers awkward.

    This guide explains the main decisions, from room dimensions and tracking technology to golf balls, subscriptions, and setup. Start with your physical space, then work toward the features that will genuinely improve your practice and play.

    1. Start With Your Room, Not the Launch Monitor

    Before comparing specifications, measure your proposed hitting area. Indoor launch monitors have different placement requirements, and those requirements can eliminate unsuitable options immediately.

    Measure the complete hitting environment

    • Ceiling height: You need clearance for your actual swing, including your longest club. Your height, swing shape, and hitting mat thickness all matter.
    • Room width: Allow room for the clubhead, your body, the enclosure, and any golfers playing from the opposite side.
    • Ball-to-screen distance: Some monitors need a meaningful stretch of visible ball flight; others measure impact within a compact hitting area.
    • Space behind the ball: Rear-mounted radar units need their own placement distance behind the hitting position.
    • Screen clearance: Leave the clearance required by the screen and enclosure manufacturer behind and around the impact surface.

    Do not confuse the launch monitor’s minimum operating distance with the minimum safe room size. A monitor may capture a shot in a compact area even when that area does not allow a safe driver swing.

    Short ball-to-screen distances

    For a short simulator room, a side-mounted camera-based or overhead system is often the most practical starting point. These systems generally do not depend on watching several feet of downrange ball flight in the same way that rear-mounted radar systems do.

    However, there is no universal minimum distance that applies to every model. Check the manufacturer’s current requirements, including hitting-zone dimensions and recommended screen separation. Also consider bounce-back and whether the projected image feels uncomfortably close.

    Left- and right-handed golfers

    A side-mounted monitor may need to move when you switch between left- and right-handed players. That can mean repositioning, realignment, and a break in the flow of a round.

    Rear-mounted and overhead systems can make mixed-handed play easier because they generally remain in place. Still, check that the supported hitting area and your room width accommodate both players safely. An offset hitting position that works for one golfer may not work for another.

    2. Understand the Main Tracking Technologies

    2. Understand the Main Tracking Technologies

    Launch monitors do not all observe a shot in the same way. Understanding the basic technologies helps explain differences in room requirements, placement, and indoor performance.

    System type Typical placement Main indoor advantage Main consideration
    Side-mounted camera-based Beside the ball Usually well suited to limited room depth Hitting-zone placement and handedness changes
    Rear-mounted radar or radar-camera hybrid Behind the golfer Often portable and convenient for mixed-handed play Requires space behind the ball and adequate ball flight
    Overhead camera-based Mounted above the hitting area Keeps hardware off the floor and supports shared use Installation requirements and mounting height

    Camera-based systems

    Camera-based monitors use high-speed images to observe the ball around impact. Depending on the model, they may also capture club delivery information.

    Their compact measurement area makes them attractive for indoor simulators. However, precise ball placement, a clear view of impact, and appropriate lighting conditions can still matter.

    Radar and hybrid systems

    Radar-based monitors observe motion using radar, sometimes combined with cameras. They commonly sit behind the player and can serve both indoor and outdoor practice.

    Indoors, their performance depends on the specific model, available flight distance, setup, and sometimes the ball being used. Do not assume all radar devices have identical requirements simply because they share a broad technology category.

    Likewise, some side-mounted products combine cameras with radar. Judge the complete device and its installation requirements rather than choosing by a technology label alone.

    3. Decide Which Data and Accuracy You Actually Need

    A long data list does not automatically make a launch monitor better. What matters is whether it provides dependable information for your intended use.

    Separate measured data from calculated results

    Launch monitors capture information about the ball, club, or both. Software then uses that information to calculate the virtual shot.

    • Ball speed: How fast the ball leaves impact.
    • Launch angle and direction: The ball’s initial vertical and horizontal direction.
    • Spin rate and spin axis: Important inputs for flight, curvature, and landing behavior.
    • Club data: Depending on the system, this may include club speed, path, face angle, or attack angle.
    • Calculated flight results: Carry distance, peak height, and other outputs produced by the flight model.

    Not every advertised metric is directly measured. Some values are estimated from other inputs, and certain club measurements require stickers, accessories, or additional purchases. Check the details rather than relying on the total number of metrics.

    Match performance to your goals

    For casual rounds with friends, reliable shot capture and believable flight may matter more than detailed club delivery numbers. For structured practice, dependable carry distances, launch conditions, and spin become more important.

    If you want to diagnose a slice, distinguish between measured information about the clubface and a ball-flight result that suggests what happened. Ball flight is useful, but it is not the same thing as a direct face-angle measurement.

    Check the shots beyond a full iron swing

    Consider drivers, wedges, chips, and putting separately. A system that performs well on full swings may have different limitations on very short shots.

    Putting support also varies by device and software combination. If realistic putting is important, verify that exact combination before buying. Otherwise, decide whether automatic putting or another simplified format would suit your rounds.

    4. Compare Popular Indoor Options by Use Case

    4. Compare Popular Indoor Options by Use Case

    Product comparisons are most useful after you understand your room and priorities. These familiar options illustrate the trade-offs without assuming one model is right for everyone.

    SkyTrak+: a side-mounted option for indoor-focused setups

    SkyTrak+ combines camera-based ball tracking with radar technology for club data. Its position beside the ball makes it worth considering when space behind the golfer is limited.

    When evaluating SkyTrak+, focus on indoor shot consistency, its defined hitting area, supported club metrics, and software access. Also account for moving the unit if left- and right-handed golfers will share the simulator.

    Garmin Approach R10: portability with indoor trade-offs

    The Garmin Approach R10 is a compact rear-mounted radar launch monitor. It appeals to golfers who want a portable device for practice and compatible simulator play.

    Indoors, pay particular attention to required distances, alignment, and which data is measured versus estimated. Its space needs and approach to spin and shot-shape information deserve consideration if detailed indoor practice is your main goal.

    Rapsodo MLM2PRO: a hybrid system with ball requirements to understand

    The Rapsodo MLM2PRO combines radar and cameras in a rear-mounted design. It is another option for golfers balancing indoor simulation with portability.

    A key consideration is its use of supported RPT-pattern golf balls for measured spin rate and spin axis. Assess value using the complete package: room requirements, appropriate balls, membership features, and access to your intended simulation software.

    SkyTrak+ versus FlightScope Mevo+

    This comparison often starts with room layout. SkyTrak+ sits beside the ball, while FlightScope Mevo+ operates behind the hitting position and requires sufficient indoor tracking space.

    SkyTrak+ may be easier to accommodate in a shorter room. Mevo+ may better suit someone who values a rear-mounted arrangement, mixed-handed use, and indoor-outdoor flexibility. Compare the required data packages and software costs as well as the hardware.

    Garmin Approach R10 versus Rapsodo MLM2PRO

    Both are portable, rear-mounted options, so neither should be selected without checking room depth. Compare their indoor spin capabilities, ball requirements, supported devices, and ongoing costs.

    For this choice, decide how much you value measured spin information, impact video features, and the overall practice experience. A lower initial hardware cost does not necessarily mean the lower total cost for your preferred setup.

    5. Check Software Compatibility and Total Ownership Cost

    The launch monitor captures the shot, but software shapes much of your simulator experience. Before buying hardware, identify the practice tools and course-play features you want.

    Confirm the complete compatibility chain

    • Simulation software: Does the exact launch monitor support your preferred platform?
    • Computer or mobile device: Does the software run on your operating system and hardware?
    • Connection method: Will the required Wi-Fi, USB, Bluetooth, or network arrangement work in your room?
    • Membership requirements: Is a paid manufacturer plan needed to enable third-party simulation or specific data?
    • Playing features: Are putting, multiplayer, online play, and practice modes supported as you expect?

    Compatibility can depend on the particular device, subscription tier, and software version. Confirm current support directly before purchasing rather than assuming that a brand-level compatibility statement covers every product.

    Budget beyond the monitor

    Your total may include simulation software, manufacturer memberships, a gaming computer, a projector, an impact screen, an enclosure, and a quality hitting mat. Special balls, mounting hardware, protective accessories, and optional data packages can add further costs.

    A protective case can be sensible for a floor-mounted monitor near beginners or frequent guests. Check that any accessory leaves the device’s sensors and required sightlines unobstructed.

    Compare complete systems over your expected ownership period. This gives a more useful picture than comparing hardware prices alone.

    6. Plan for Alignment, Golf Balls, and Troubleshooting

    6. Plan for Alignment, Golf Balls, and Troubleshooting

    Even a capable launch monitor can produce disappointing results when the setup is inconsistent. Good installation habits are part of choosing the right system, not an afterthought.

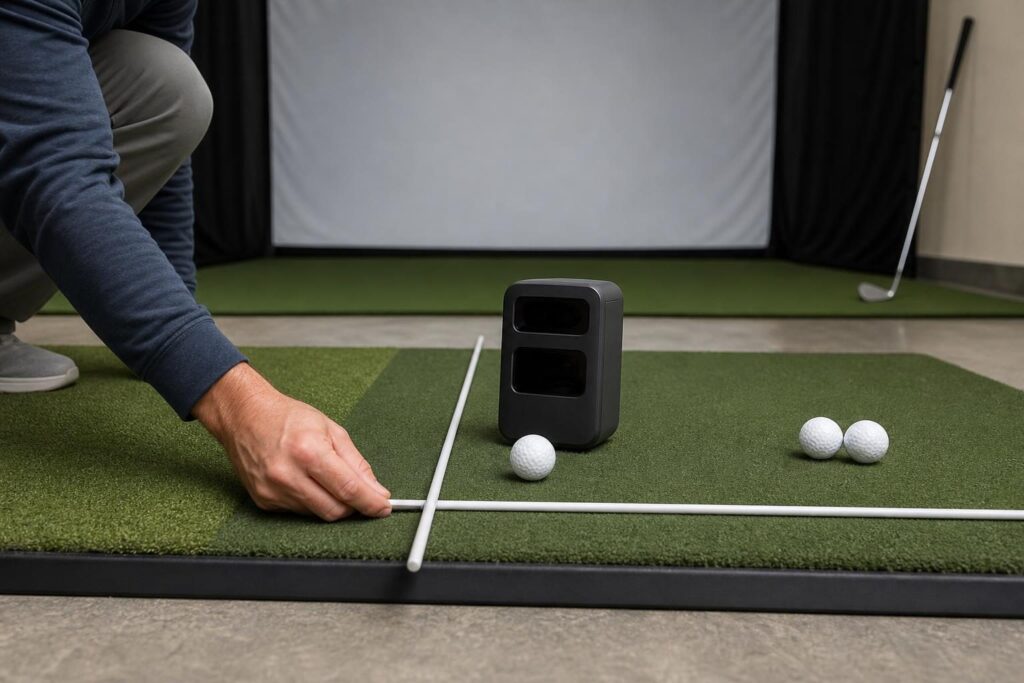
    Alignment and calibration basics

    Follow the manufacturer’s instructions for placement, level, height, and target alignment. These procedures differ between devices; not every monitor requires the same type of calibration.

    1. Establish a clear physical target line from the hitting position.
    2. Place or mount the monitor at the specified distances and height.
    3. Check the relationship between the hitting mat and the monitor’s reference surface.
    4. Use the supplied alignment tool, camera view, or software process where available.
    5. Hit several normal shots and investigate unexpected start lines before making swing changes.

    The center of your projected screen is not automatically the correct target line, especially in an offset installation. Your physical alignment and software aim settings need to agree.

    Do indoor launch monitors need special golf balls?

    Some work with ordinary golf balls, while others require or benefit from marked balls for particular measurements. Requirements may include printed patterns, reflective markings, or another supported design.

    For example, the MLM2PRO uses supported RPT-pattern balls for its measured spin features. Other systems have different requirements, so do not assume a ball designed for one monitor improves another.

    Use clean, undamaged balls suitable for your impact screen. Also check whether a required ball matches the playing characteristics you want for practice.

    How to approach missed shots

    If the monitor fails to register shots, start with repeatable checks rather than changing several settings at once.

    • Confirm that the ball is within the supported hitting zone.
    • Check alignment, distances, mounting height, and level.
    • Clean accessible lenses or sensors according to the manufacturer’s instructions.
    • Verify any ball-marking or club-sticker requirements.
    • Check device readiness, battery level, connection stability, and firmware.
    • Investigate lighting or radar interference where relevant to the model.

    Notice whether missed shots occur with every club or only with chips, putts, or high-speed swings. That pattern can help distinguish a general setup issue from a shot-specific limitation.

    7. Build a Shortlist Around Your Priorities

    Once you have checked the essentials, narrow your choices to two or three systems. Use your most restrictive requirement first.

    Your priority What to investigate first
    Short room depth Side-mounted camera-based and overhead systems
    Frequent left- and right-handed play Systems that remain fixed for both players
    Indoor and outdoor practice Portable systems with suitable requirements in both environments
    Detailed swing improvement Measured ball and club data, including any required add-ons
    Simple family entertainment Reliable capture, easy software, and straightforward player switching
    Controlled ongoing spending Total software, membership, accessory, and hardware costs

    Before committing, read the setup manual for each finalist. Look for independent indoor evaluations that explain room dimensions, ball choice, software, and test conditions rather than offering unexplained accuracy claims.

    If possible, arrange a demonstration using the shots you expect to play. Confirm the return policy too, particularly if your room is close to the manufacturer’s minimum requirements.

    Conclusion

    The best launch monitor for an indoor golf simulator is not simply the one with the most data. It is the one that works safely in your room, captures your intended shots reliably, and supports the software experience you want at a manageable total cost.

    Measure first, compare tracking and data needs second, and verify software and setup requirements before buying. That sequence will help you build a simulator that is easier to use and more useful every time you play.

  • Hello world!

    Welcome to WordPress. This is your first post. Edit or delete it, then start writing!